Ubuntu 20.04 LTS的无人值守安装
实验一(exp0x01)
作业说明:
本次作业是 实现Ubuntu 20.04 LTS的无人值守安装
参考链接
注意本文档依旧采用了GIthub作为图床 请你确保你能访问https://raw.githubusercontent.com(但是用来raw的镜像站 qwq)
0x01 准备所需文件
由上述参考链接可知
我们主要需要准备 一下两个文件
user-data
meta-data
其中 meta-data文件可以为空 则我们时所需要着重准备的文件为user-data
参考/var/log/installer/autoinstall-user-data我们 对照 Ubuntu 20.04 + Autoinstall + VirtualBox 中提供的示例配置文件 酌情修改
首先 /var/log/installer/autoinstall-user-data内容如下
#cloud-config
autoinstall:
  apt:
    geoip: true
    preserve_sources_list: false
    primary:
    - arches: [amd64, i386]
      uri: https://mirrors.ustc.deu.cn/ubuntu/
    - arches: [default]
      uri: http://ports.ubuntu.com/ubuntu-ports
  identity: {hostname: xg-lab, password: $6$cFRo1kra1yGPYKZb$s7ykAXj0i0FTvAShvUtAGZNjIrUGSTdusvz2o73o3XT2yQzf90hD/y.biQFVlXKJSEkqiqOG6WUi/J0V6szAo/,
    realname: LJYXG, username: xg}
  kernel:
    kernel: {package: linux-generic}
  keyboard: {layout: us, toggle: null, variant: ''}
  locale: en_US.UTF-8
  network:
    ethernets:
      enp0s3: {dhcp4: true}
      enp0s8: {dhcp4: true}
    version: 2
  ssh:
    allow-pw: true
    authorized-keys: []
    install-server: true
  storage:
    config:
    - {ptable: gpt, serial: VBOX_HARDDISK_VB02f046f4-b9ae0c27, path: /dev/sda, wipe: superblock,
      preserve: false, name: '', grub_device: true, type: disk, id: disk-sda}
    - {device: disk-sda, size: 1048576, flag: bios_grub, number: 1, preserve: false,
      grub_device: false, type: partition, id: partition-0}
    - {device: disk-sda, size: 1073741824, wipe: superblock, flag: '', number: 2,
      preserve: false, grub_device: false, type: partition, id: partition-1}
    - {fstype: ext4, volume: partition-1, preserve: false, type: format, id: format-0}
    - {device: disk-sda, size: 20397948928, wipe: superblock, flag: '', number: 3,
      preserve: false, grub_device: false, type: partition, id: partition-2}
    - name: ubuntu-vg
      devices: [partition-2]
      preserve: false
      type: lvm_volgroup
      id: lvm_volgroup-0
    - {name: ubuntu-lv, volgroup: lvm_volgroup-0, size: 20396900352B, wipe: superblock,
      preserve: false, type: lvm_partition, id: lvm_partition-0}
    - {fstype: ext4, volume: lvm_partition-0, preserve: false, type: format, id: format-1}
    - {path: /, device: format-1, type: mount, id: mount-1}
    - {path: /boot, device: format-0, type: mount, id: mount-0}
  updates: security
  version: 1
略加修改 即可制作出我们自己的user-data
| 属性 | 值 |
|---|---|
| 用户名 | xg |
| 密码 | 0 |
| HostName | XG-Studio |
注意 0是一个弱密码 生产环境中绝对不要用!!!!
#cloud-config
autoinstall:
  apt:
    geoip: true
    preserve_sources_list: false
    primary:
    - arches: [amd64, i386]
      uri: https://mirrors.ustc.edu.cn/ubuntu/
    - arches: [default]
      uri: http://ports.ubuntu.com/ubuntu-ports
  identity: {hostname: XG-Studio, password: $6$cFRo1kra1yGPYKZb$s7ykAXj0i0FTvAShvUtAGZNjIrUGSTdusvz2o73o3XT2yQzf90hD/y.biQFVlXKJSEkqiqOG6WUi/J0V6szAo/,
    realname: LJYXG, username: xg}
  keyboard: {layout: us, toggle: null, variant: ''}
  timezone: Asia/Shanghai
  locale: en_US.UTF-8
  network:
    ethernets:
      enp0s3: {dhcp4: true}
      enp0s8: {dhcp4: true}
    version: 2
  ssh:
    allow-pw: true
    authorized-keys: []
    install-server: true
  storage:
    config:
    - {ptable: gpt, path: /dev/sda, wipe: superblock,
      preserve: false, name: '', grub_device: true, type: disk, id: disk-sda}
    - {device: disk-sda, size: 1MB, flag: bios_grub, number: 1, preserve: false,
      grub_device: false, type: partition, id: partition-0}
    - {device: disk-sda, size: 1GB, wipe: superblock, flag: '', number: 2,
      preserve: false, grub_device: false, type: partition, id: partition-1}
    - {fstype: ext4, volume: partition-1, preserve: false, type: format, id: format-0}
    - {device: disk-sda, size: -1, wipe: superblock, flag: '', number: 3,
      preserve: false, grub_device: false, type: partition, id: partition-2}
    - name: ubuntu-vg
      devices: [partition-2]
      preserve: false
      type: lvm_volgroup
      id: lvm_volgroup-0
    - {name: ubuntu-lv, volgroup: lvm_volgroup-0, size: -1, preserve: false,
      type: lvm_partition, id: lvm_partition-0}
    - {fstype: ext4, volume: lvm_partition-0, preserve: false, type: format, id: format-1}
    - {device: format-1, path: /, type: mount, id: mount-1}
    - {device: format-0, path: /boot, type: mount, id: mount-0}
  version: 1
0x02 制作ISO文件
由参考链接可知如下内容
内主要为如下两个文件
user-data
meta-data
文件格式为FAT32
卷标为CIDATA
以下为服务上的操作
注 :
1、本人的user-data文件 是通过WinSCP传到虚拟机上
2、本人所用SSH为 Windows Terminal下的 Power shell
3、本人工作目录 /home/xg/CIDATA/
准备文件
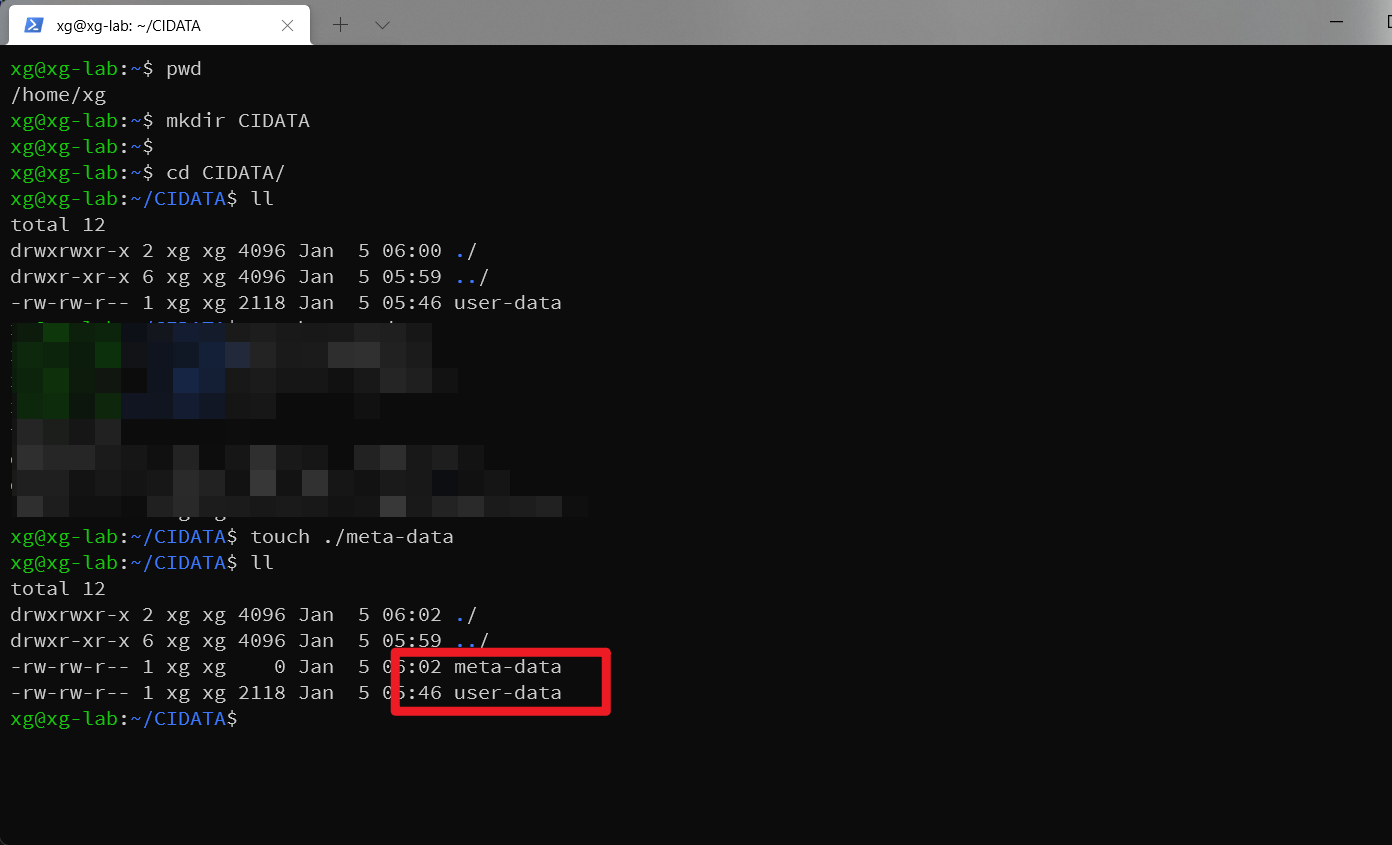
创建ISO文件
指令
安装 genisomage
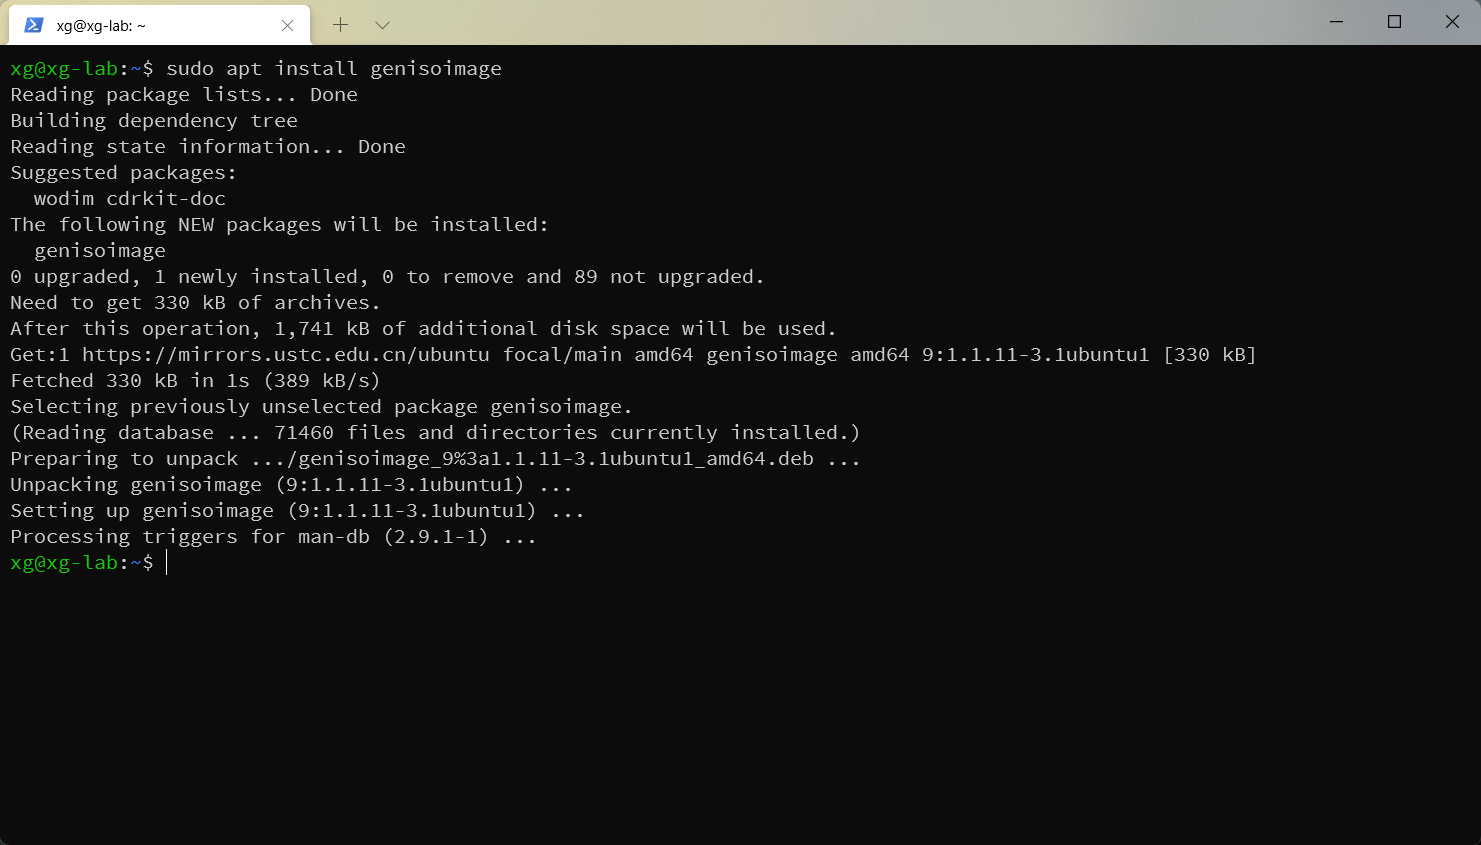
指令如下
sudo apt install genisoimage创建ISO
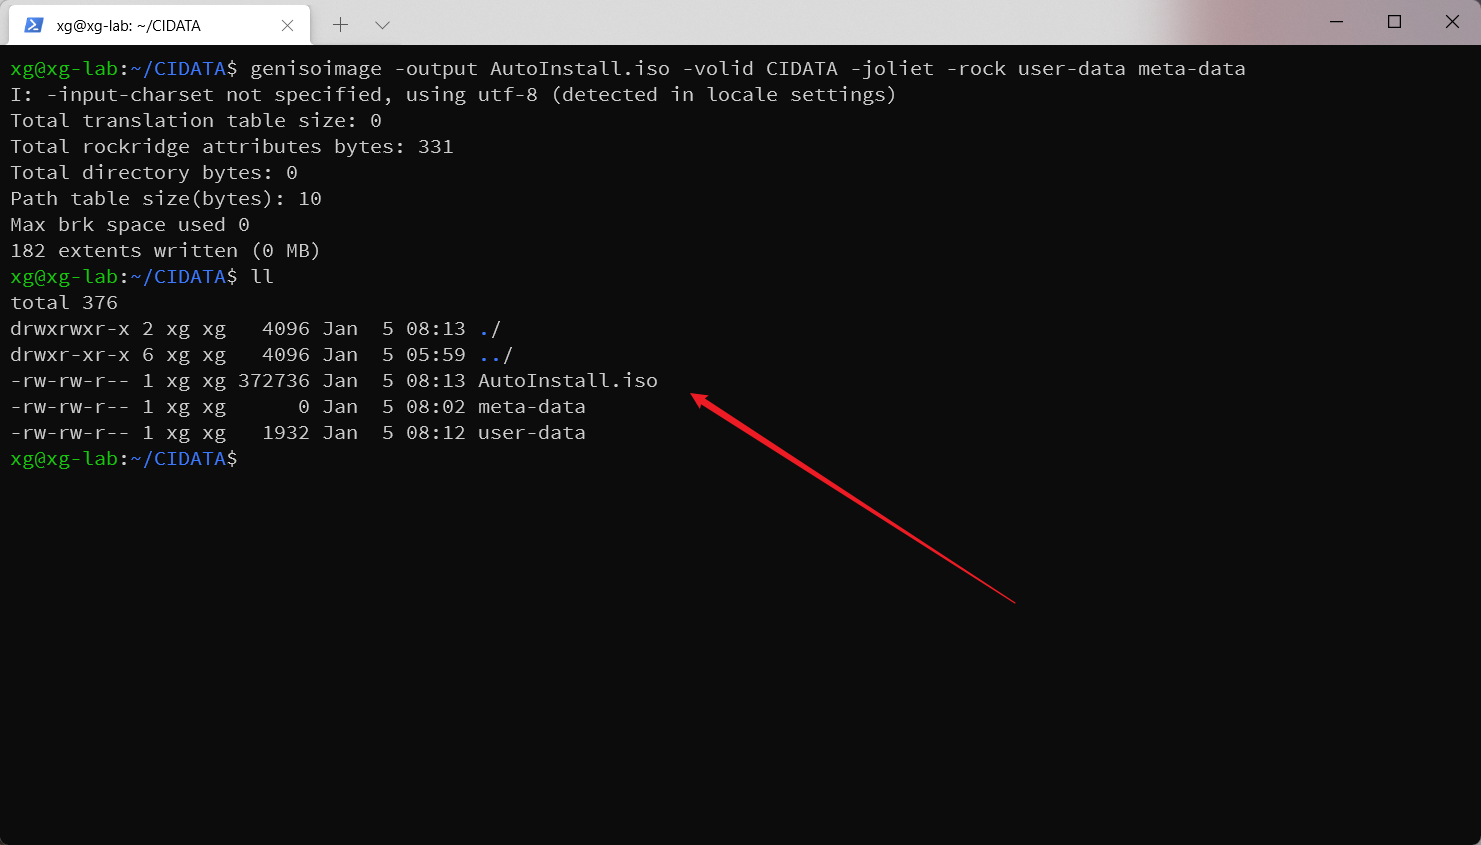
#此为老师的文档所给指令
genisoimage -output AutoInstall.iso -volid CIDATA -joliet -rock user-data meta-data
将该文件 copy到win我们下面将测试autotinstall
0x03 虚拟机下AutoInstall
配置虚拟机
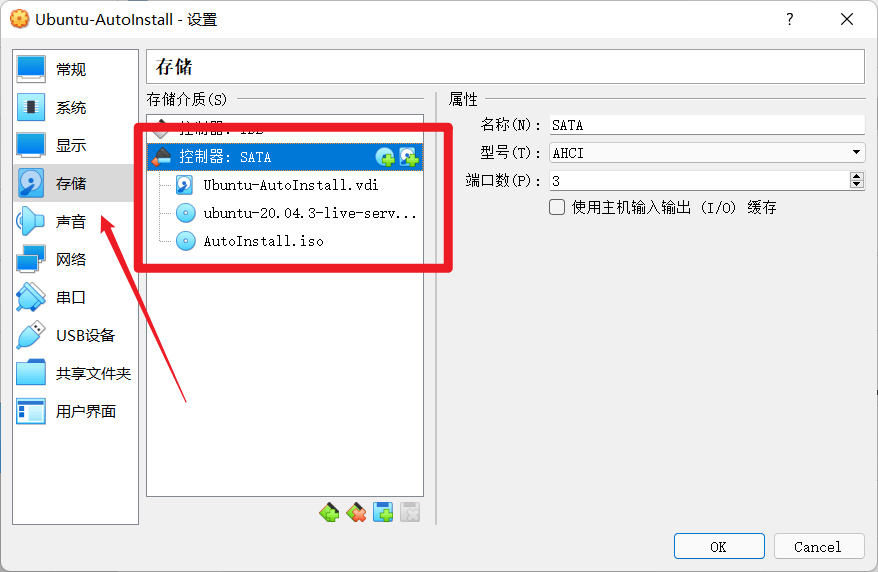
在储存部分如图进行着重设置
特别注意
Live-Server 镜像第一
AutoInsyall 镜像第二
启动虚拟机
等待后自检出现
Continue with autoinstall? (yes|no)
输入yes 即可 autoinstall
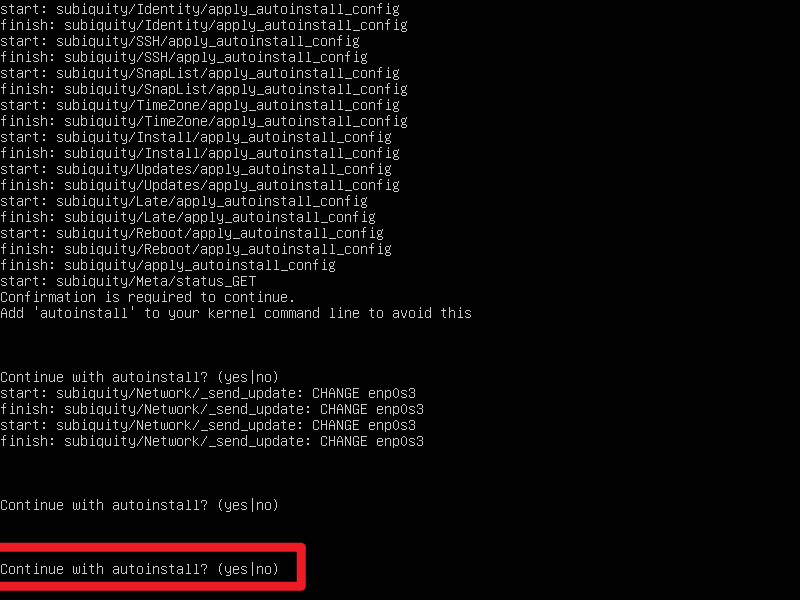
此后将进行自动安装
稍等片刻后 服务器将自行重启 并自动安装一点东西后
之后安装就已经完全完成了 登录之后如下
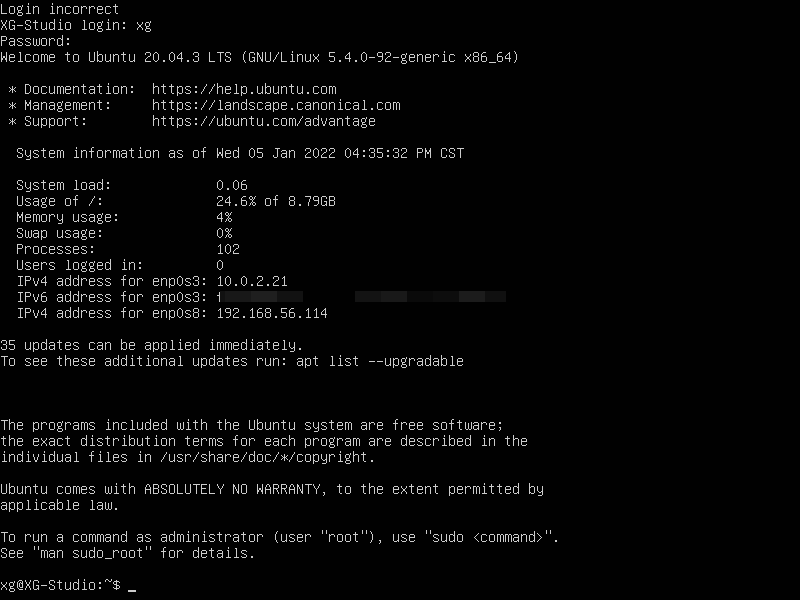
截至至此 本次实验完成
仅以此为记录
Author:LJYXG
本作品采用 知识共享署名-相同方式共享 4.0 国际许可协议 进行许可。
评论已关闭